Tip 56: Getting Slope or Level in a Photogrammetry Project

There are a couple of ways of putting a photogrammetric project into a gravity-aligned coordinate system. A standard approach is to use external control points. Control points are points created by conventional survey methods. These XYZ points are imported into PhotoModeler using the External Geometry Explorer, and assigned to matching 2d points in the photos. PhotoModeler can then place the photogrammetric project in a coordinate system matching the control – which would typically have been leveled.
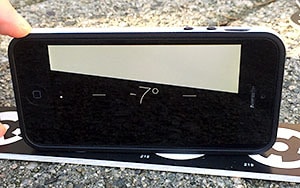
This tip video shows another method when you don’t have access to a survey data set. Here we use a plumb-line. A plumb-line is a weighted string, wire or line that hangs from a support. This plumb-line will be vertical in the local gravity field. The tip shows how to use the plumb-line to orient the PhotoModeler project to true level. Then accurate height differences and slope measurement are shown. The image above shows the rough measurement of 7 degree slope by an IPhone’s level app. You can see in the video that the same slope is measured at 7.34 degrees by PhotoModeler.
While this sample is relatively simple (and you’d probably just use a level with angle capability for a single slope measure, or your iphone if precision is not needed), this sample does illustrate a technique that can be used in more complex projects along with other measurements and modeling tasks.
Watch the Youtube video to see how the plumb-line is used to level the project:
