Tip 74: Troubleshooting with the Max. Residual status bar button
Did you know that the Max. Residual status bar is a handy troubleshooting tool when working with manually marked or sub-pixel target marked projects?
PhotoModeler’s Max. Residual status bar (at bottom right of the application window) shows the project’s maximum residual and is also a button, which when clicked, opens the photo and highlights the point mark with the highest residual. A residual error is the difference (in image pixels) between where a point is marked on a photo and where PhotoModeler thinks it should be given the point’s 3D position.
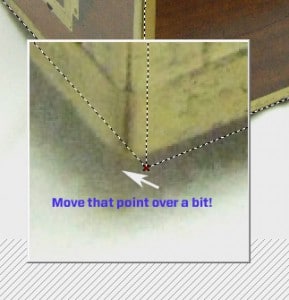
Once the photo with the problem point is open, the “Open Photos Showing Selected” tool (select the problem point, right click to show a menu, select Open Photos Showing Selected) can be used to open all photos on which that point is marked. At this stage, it usually becomes clear that the problem is a mis-marked or mis-referenced point, or a mis-coded target. The point’s references can be checked (e.g. is the point correctly and accurately marked? are neighbor points the same across all photos?).
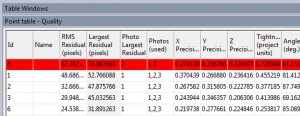
The Point Table can also be used to identify problem points. By default, the “Quality” (click the View menu, Point table – Quality) table layout opens with the point data sorted by Largest Residual. This will show all points in the project and if there are several outliers with high residual values, it might indicate multiple problem points.
Once the problem points are identified, the Unreference tool (also on the right click menu) can be used to clear the reference so that it can be properly referenced. This also applies to coded targets. To fix up the points, the Quick Reference tool or the Reference mode is used to re-reference the points appropriately.
These types of problems are common with complex projects or symmetrical shapes. It may be necessary to cycle through the process multiple times: Click the Max. Residual status bar button, Open Photos Showing Selected, Re-reference and then re-process. It’s important to reprocess after each cycle where possible because if a solved project has just one or two problem points, PhotoModeler will try to fit the model to all points in the solution. This can elevate the residuals on many points, even those that are correctly marked & referenced. If after re-processing there are still high residuals, start the troubleshooting cycle again.
It is a good idea to monitor the Max. Residual (on the status bar, and/or in the Point Table) and correct problems as they arise. Once many mistakes go unnoticed tracking down the problems is harder.
This process can also be used to ‘tighten up’ a project. Even if the residuals aren’t notably high, manually marked point positions with relatively high residuals can often be fine tuned by zooming in or using the ‘Alt’ key zoom feature to pinpoint the correct mark location.
A well-marked, manually-marked point project with a good spread of points and a calibrated camera should have a maximum residual well below 5 pixels. In an accurate sub-pixel target marked project, the maximum residual should be below 1 pixel. There are cases when the residuals can be high even with properly marked/referenced points and targets (e.g. due to a weak calibration or no calibration, low camera angles, low point or photo count – See knowledge base article on the multiple factors contributing to accuracy) but this method can be used to track down these easy-to-fix point problems.
Watch the Youtube video for an overview of using the Max. Residual Status Bar in PhotoModeler:

