Why My Deck Templates Measured in PhotoModeler Might Not Fit
Introduction
This document discusses possible accuracy issues with marine deck measurement projects, and why a manufactured deck piece may not fit or you may have issues with CAD alignment.
The best way to get good results in PhotoModeler is to set up the projects well, with plenty of photo overlap, good camera angles (a mix of top-down and angled), a reasonable number and spread of targets in each photo, and a well-calibrated camera. When the coordinate system is set up (including multiple accurate scales), the resulting model will be accurate, and the manufactured decking will fit well.
Digital templates are exported from PhotoModeler for use in CAD or other printing/cutting software. Make sure the model is correct within PhotoModeler before exporting or producing any final products to avoid wasted material.
This document explains how to assess a project’s accuracy, and describes the most common sources of inaccuracy and alignment problems in boat deck measurement projects.
Note this document assumes the reader is familiar with the standard PhotoModeler approach for deck modeling and measurement as described in other documents and videos.
This guide is intended for those working with PhotoModeler on boat deck measurement projects that are encountering accuracy and fit issues. It describes:
Assessing Project Quality and Accuracy:
The main reasons for poor fit are:
Assessing Project Quality and Accuracy
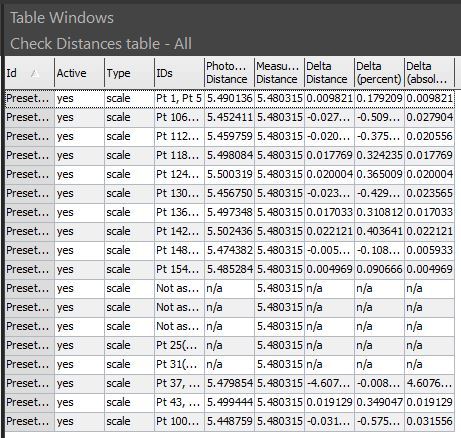
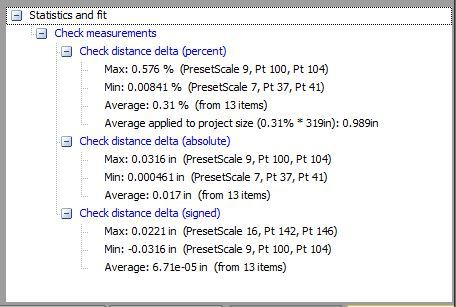
There are several metrics that can be used to assess a project’s accuracy. If any of these indicate problems, you will need to understand why – and the ‘Main Reasons…’ section below should help.

The Main Reasons for Project Fit Issues
The most common reasons for a fit problem are described in this section.
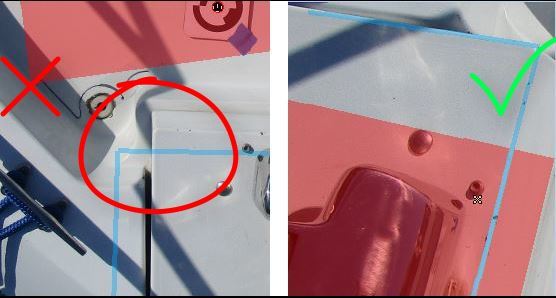
An incorrect Surface was used in drawing
Tracing deck panels in photos using PhotoModeler's Surface Draw is analogous to laying down Mylar on a panel and tracing with a pen - the Surface in PhotoModeler is the Mylar, and the Surface Draw lines are the pen markings.
If the plane surface defined in PhotoModeler does not match the actual deck surface (too high or at a wrong angle), you will usually see projected 3D surface draw alignment issues in other photos, especially in photos taken at a lower angle.
Solution
Make sure to define plane surfaces using the target points on or near the panel being traced. Defining multiple plane surfaces (e.g., one per decking panel) is advisable, especially when the deck surface is not that flat. If the surface draw is assigned to the wrong surface, you can reassign using the setting on Surface Draw properties as shown here.
Incorrect scales
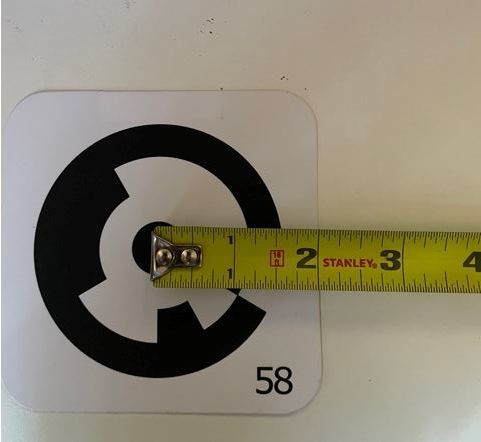
When using the PhotoModeler Letter Sheet target system, and applying the associated Coded Target Preset Configuration, the scales should be accurate. Note that if you print your Letter Sheet targets (vs buying them from PhotoModeler Technologies) you will need to print at 100% and confirm the print size.
Also, if you are using a custom set of targets, the scales will need to be added manually, or a custom Coded Target Preset Configuration will need to be defined.
If the defined scale(s) are not accurate, the model may appear OK in PhotoModeler, but the output and manufactured panels will not align well – the panels may be over or under-sized.
Solution
It is critical that the scales match the actual distances between the point pairs. Use a precise measuring device and measure twice when setting up scales!
To scale a PhotoModeler project make sure to:
The Appendix goes into more detail on scale issues in PhotoModeler.
Long and narrow sections with poor target layout
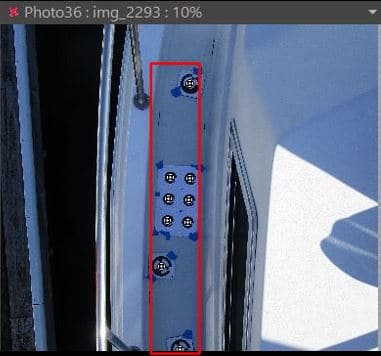
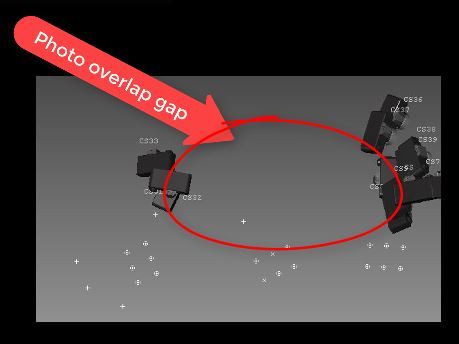
Long and narrow models often have weak geometry which will be harder for PhotoModeler to process. Examples on a boat are narrow side paths or gunwales. Possible issues with these are: a) photos are taken in a line down a narrow path that only overlap with adjacent photos, b) targets take up a relatively small portion of the photo frame (poor coverage), c) targets are in a line, and d) there are no ‘overview’ photos capturing larger portions of the scene (there is no 'cross bracing' or other support/connection between the photos).
This page talks about problems with photo orientation due to issues like poor target layout.
Solution
Try to lay out targets so that at least 15 targets appear in each photo, with good spread.
Instead of just a narrow row of targets down the section, also place some targets on the deck beside it. If need be, place targets on parts of the boat that won’t be modeled for decking, to increase spread and connectivity between sections.
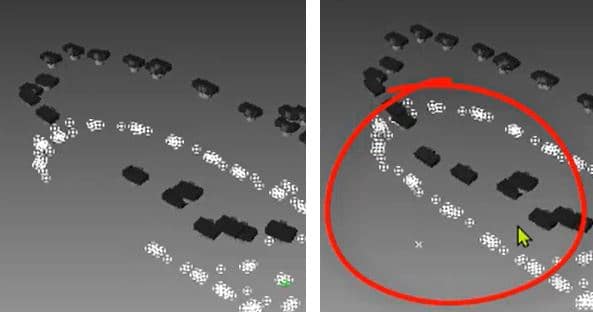
Also, try to tie both ends of long narrow sections of the deck with other parts so that rather than a long “I” or “U” shape, an “O” shape is formed by the targets.
See Targets and Photography Tutorial Video (at 1:30) - from which the image was taken.
Low photo overlap
Photos that do not overlap much can contribute to model weakness because this limits the number of point ‘references’. Plenty of photo overlap gives PhotoModeler good mathematical redundancy and strong geometry to solve 3D point positions.
Solution
Try to take photos so that each point appears on at least three, and ideally more photos. Reduce the distance taken between photos.
Also take angled and overview shots to capture large sections of the deck to help tie the scene together (a camera mounted on a pole can be used for wide overview shots).
Camera calibration issues
The camera calibration information used by PhotoModeler (focal length, pixel size, lens distortion) greatly affects the accuracy of the measurement project. Incorrect calibration can cause the deck measurement to be the wrong size or be warped, or it can also prevent some photos from orienting (red Xs). If your decking project has good point coverage and good photo overlap and the project otherwise looks properly set up, the camera and its calibration may be to blame for accuracy issues. Also note that a calibration that is just a bit off can lead to subtle accuracy issues - it is good to ensure you have the best camera calibration for all your deck projects.
Cameras can be calibrated a number of ways: a) Letter Sheet calibration, as shown in the deck instruction videos, b) automatic calibration during the initial project solution, c) multi-sheet calibration, and d) camera optimization during a subsequent project optimize.
While the deck tutorial videos recommend doing a Letter Sheet calibration and using that camera for future projects, we now recommend that for the highest accuracy that Auto-calibration (run doing initial processing), or Camera Optimization (run during a subsequent optimization) is run on photos that are your typical deck photos. The Letter Sheet calibration and the Multi-sheet calibration are still a good place to start, but if you want the highest accuracy or are having subtle dimension issues, consider running a calibration on a deck project. Note that not all deck projects are suited to Auto-calibration or Camera Optimization because the photo angles are not sufficient. You can find a suitable set of photos though and save and reuse that camera in future projects.
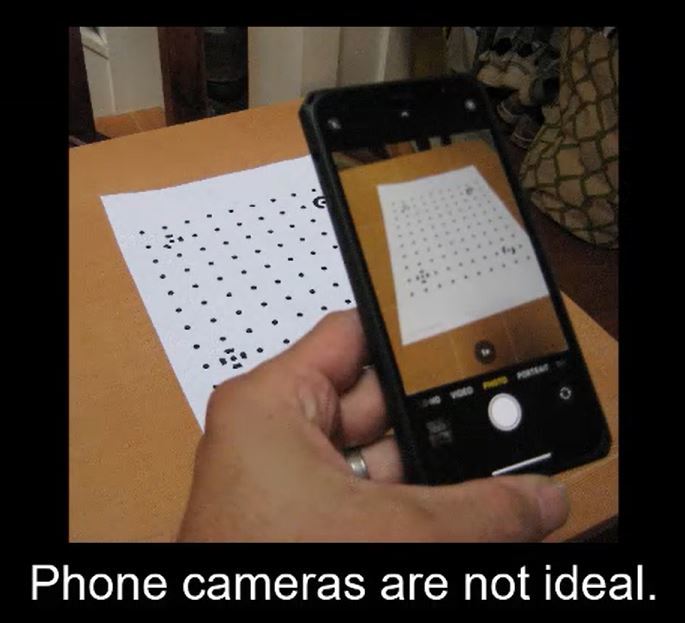
Note 1. Some cameras are harder to get an accurate and stable calibration than others. Cameras with zoom lenses can be less stable (meaning the calibration changes), and newer mobile phone cameras have built-in optical image stabilization (OIS) that inherently destabilizes the camera lens because the lens shifts when the camera moves.
Note 2. If you have a successful calibration of a camera in one deck project, you can use that camera in future projects that use the same camera and settings.
Solution
For highest accuracy projects: a) use a good quality camera, ideally with a fixed (non-zoom) lens, b) avoid modern mobile phone cameras (see cameras), and c) ensure a good camera calibration for the typical camera distance in your deck projects. For weaker projects, use a camera calibration from a previous successful project.
PhotoModeler Tech Support is available to help
If a project seems like it meets all requirements, but accuracy is still low, it can be sent to PhotoModeler Tech Support for a review. In PhotoModeler, use the 'Send Files to Support' tool (click File, Help, Send Files...).
APPENDIX A – An In-depth Look at Scaling
A photogrammetry project needs external scale input to provide absolute (vs relative) measurement. Multiple scale inputs help average out the errors and can help identify correctable errors. Only some scale errors are detectable and correctable within PhotoModeler.
Why External Scale is Needed
When PhotoModeler solves a project, it does so in a relative fashion. That is, everything is correct proportionally, but no real-world size is known. For example, the relative solution means that we know a box is half as high as it is wide, but we do not know the actual height in inches. Another example is that a PhotoModeler project of a car could be of a toy car, or of a full-sized car and it would look the same. To have the project match a real-world size, a scale is needed.
The scale is a known distance between two of the project’s points.
To help illustrate how scale work, imagine you have a 12-inch-long flat metal bar placed in the scene before the photos are taken.
If you tell PhotoModeler the length of this bar is 12 inches, the project will adjust so that the distance between the ends of the bar are exactly 12 inches, and every other point in the project will scale proportionally.
If a single scale is used the project will match that one scale precisely.
Sources of Scale Error
Scales will not be perfect though. There are three main sources of scale error:
All three sources of error can cause issues with your final project size and fit.
Two manufacturing errors might be inconsistent manufacturing sizes across the scales, and incorrect measurement of true scale distance. Some use errors might be a scale that is flexible and is bent, or a scale that is broken.
And lastly, PhotoModeler measurement errors come from incorrect entry of scale distance, camera calibration, photo marking precision, and other project errors such as orientation.
How do we detect or compensate for these errors?
Why Multiple Scales?
The problem with only using one scale is this: if the scale is wrong, there is no way to know your project is the wrong size. If you had accidently entered a value of 11 inches for the scale, the project would be smaller than the real world. Or, if you had used the wrong bar and it was 6 inches long, but you entered a scale of 12 inches, the project would be two times bigger than the real world.
To help avoid issues like this we recommend using more than one scale. These scales can then be checked against each other, and an average of the scales can be applied to the project.
Scale Deltas
PhotoModeler has a concept of a scale ‘delta’. A scale delta tells us how different PhotoModeler’s computed distance is compared to the user-entered scale distance. The software averages the scales for best fit and tells you how different PhotoModeler thinks each scale distance is from what you entered. The sources of errors listed above result in these deltas being non-zero.
For example, here are distances that PhotoModeler computed between five pairs of scale points and their deltas.
Scale # | Between Points | User-entered Scale Distance | PhotoModeler Computer Distance | Delta |
|---|---|---|---|---|
1 | 1 & 3 | 12.0 | 12.1 | 0.1 |
2 | 10 & 11 | 12.0 | 11.95 | -0.05 |
3 | 12 & 14 | 12.0 | 11.9 | -0.1 |
4 | 20 & 22 | 12.0 | 12.0 | 0.0 |
5 | 45 & 47 | 12.0 | 12.05 | 0.05 |
The absolute and relative sizes of the deltas can tell you something about how good the scales are or if there are issues.
Detecting Gross Scale Errors
There are two types of gross scale errors.
The first gross error is hard to detect within PhotoModeler and that is when the scales are consistently wrong due to manufacturing or measurement. This can be detected by external audit only. (e.g., all scale bars are 1 cm too long).
The second gross error can usually be detected and is when just one scale (or a small set of scales) of many is wrong. For example, if one of the five bars had an end broken off, but PhotoModeler was told all five of the scale distances were still 12 inches long, the broken one would have a higher delta than the other four. This is because of the redundancy and the way the four correct scales would out-weigh the one wrong one in the average. It might look like this:
Scale # | Between Points | User-entered Scale Distance | PhotoModeler Computer Distance | Delta |
|---|---|---|---|---|
1 | 1 & 3 | 12.0 | 12.11 | 0.11 |
2 | 10 & 11 | 12.0 | 12.10 | 0.10 |
3 | 12 & 14 | 12.0 | 12.10 | 0.10 |
4 | 20 & 22 | 12.0 | 12.12 | 0.12 |
5 | 45 & 47 | 12.0 | 11.50 | -0.5 |
To fix this, first check the marking of the points in the photos for the bar ends. If the marking is wrong, fix it and look at the deltas again.
Then look at the bar in the photos. Does it look broken? Then you could disable the scale (#5 in this case) in PhotoModeler, as you can see the bar is physically broken.
Averaging Out with No Gross Error
If there is nothing obviously wrong with the scale (not bent, warped, broken, or mismarked) then we usually leave all scales in place and let the averaging account for the imperfections in the measurement process.
For example, imagine the person creating the bars only had a tape measure with ½ inch markings. They measure as closely as they can, but they can’t always guarantee all the bars are exactly 12 inches long. This means when you tell PhotoModeler all of them are 12 inches, there will be some variation and the deltas will all vary a bit.
Let’s say that four bars are very close to 12 inches long, and one bar is 12 ¼ inches long due to manufacturing variation. All scales are entered at 12 inches because that is the best they could be measured with that tape measure. None of the computed deltas would be zero (due to averaging and other imperfections), and one scale delta might be a bit bigger. The overall project scale is good, and you would not disable any scales even though one of them had a slightly higher delta value than the others. There is nothing obviously wrong with the scales, so you keep them all and let the averaging take care of it. The resulting project will still be good.
Lastly, let's take the opposite case. For the true bar lengths, only one is very close to 12 inches and the other four are all closer to 12 ½ inches. We still enter 12 inches as the scale for all (as that was the information given us). You can see the scale of the project will all be skewed but again you won’t be able to tell there is an error and we leave them all in place. The project scale will now be off a bit and your fit may not be great. The way to fix this error (which would be detected by an external audit of some form), is to go back to the original bars and measure them more accurately to determine their true length and use those scales in PhotoModeler instead.
