With a Camera Perform Non-Contact Industrial Measurement

Analytical mode shapes of structures are usually obtained by performing finite-element analysis. It is simple to obtain accurate computer models and mode shapes of structures using photo modeling. Many traditional measurement tools (touch probes, calipers, etc.) are unsuitable for non-contact modeling of structures. Accurate 3D models of structures can be generated from digital photographs using photogrammetry.
Photogrammetry is also used in industries for measuring the dynamics of assembled systems. Using this technique allows researchers to study how small changes to a system affect its overall performance. It is difficult to take measurements in hazardous industrial environments using most methods. Accurate 3D representations of systems, that cannot be easily accessed, can be obtained from photographic images using photogrammetry.
Creating 3D modes of structures using photogrammetry
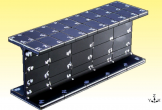
The dynamic behaviors of a structure are usually characterized by performing experimental modal analysis (EMA). The modes obtained from this experimental survey are compared with analytical results obtained by performing finite-element analysis (FEA). A finite-element analysis utilizes a computer model to characterize the structural dynamics of a structure. Physical properties and geometry of the structure are required to construct an accurate computer model. The analytical modes of a structure are obtained by solving dynamic equations. Photo modeling technology allows creation of dimensionally accurate 3D representations of structures from digital photographs. As compared to other methods, it is simple to generate FEA models from photographic images. In addition, this technique provides accurate modes of vibration. This study on obtaining modes of a structure describes how modes of vibration are obtained using photogrammetry.
Non-contact modeling of structures
The photogrammetric technique allows creation of accurate 3D representations of structures from images. A digital camera is used to capture different perspectives of the object. The captured photographs are processed to create a 3D photo-textured model. Different dimensional attributes of a structure are obtained by scaling the three-dimensional model. The 3D photo-textured model can be exported to generate ortho-metric files and photos that are suitable for programs such as AutoCAD, 3D Studio, and so on. This paper on non-contact modeling of structures describes how digital close-range photogrammetry can be used for modeling structures in a cost-effective manner. PhotoModeler, a photogrammetric tool, was used for this study.
Measuring “as assembled” geometry using photogrammetry
It is not practical to measure the dynamics of an assembled system using traditional measurement methods. The photogrammetric technique is suitable for measuring the geometry of assembled systems. This study on measuring the geometry of an assembled suspension describes how photogrammetry was used for measuring the dynamics of an automobile. Using PhotoModeler, the researchers were able to study how small changes to an assembled suspension impact the dynamics of an automobile.
Creating 3D CAD models using photogrammetry

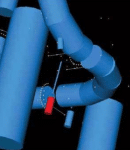
A 3D pipe model created from photographs
Taking measurements in hazardous industrial environments is a process that demands time and effort.
Depending on the risks involved, it can be impossible to use traditional tools such as a measuring tape. Using photogrammetry, it is easy to take measurements in different industrial environments. The captured photographs can be processed to generate accurate 3D CAD models of a system or a plant.
Designing and testing inflatable wings

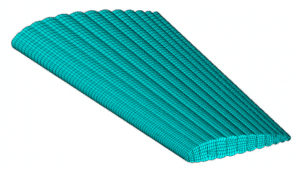
Meshed wing model
Studying the effects of forces that act on inflatable wings is a process that demands accurate and reliable measurements. The obtained measurements are used to optimize the design of inflatable wings and improve aerodynamic efficiency. Photogrammetry allows researchers and manufacturers of inflatable wings to study how shape changes affect aerodynamic forces. In this paper on flight testing of inflatable wings, researchers used PhotoModeler to study how aerodynamic forces are impacted by changes in the shape of the wings.
Conclusion
Accurate three-dimensional representations of industrial systems can be generated from images using photogrammetry. This non-contact measurement method is cost-effective, and it is suitable for a wide range of industrial applications. Photogrammetry is suitable for creating accurate computer models, measuring the dynamics of assembled systems, creating dimensionally accurate 3D representations of industrial systems, et cetera.
