

The Camera Viewer Dialog is used to view and manipulate the cameras used by the current project, and also provides access to the Camera Library. You can create new approximate cameras, delete a camera, copy a camera, modify camera parameters, load cameras from disk, and access the camera library from this dialog. This dialog is accessed through the "Cameras..." tool on the ribbon toolbar’s Review Tab item, and Photo Properties from the "Open Camera Viewer…" hyperlink.
A PhotoModeler project can have many different cameras or just one. A project can also have cameras of different types (video, digital or film). As long as the proper camera description is loaded into PhotoModeler (and appears in the above list) and is assigned to the correct Photographs then it will be used to compute 3D data.
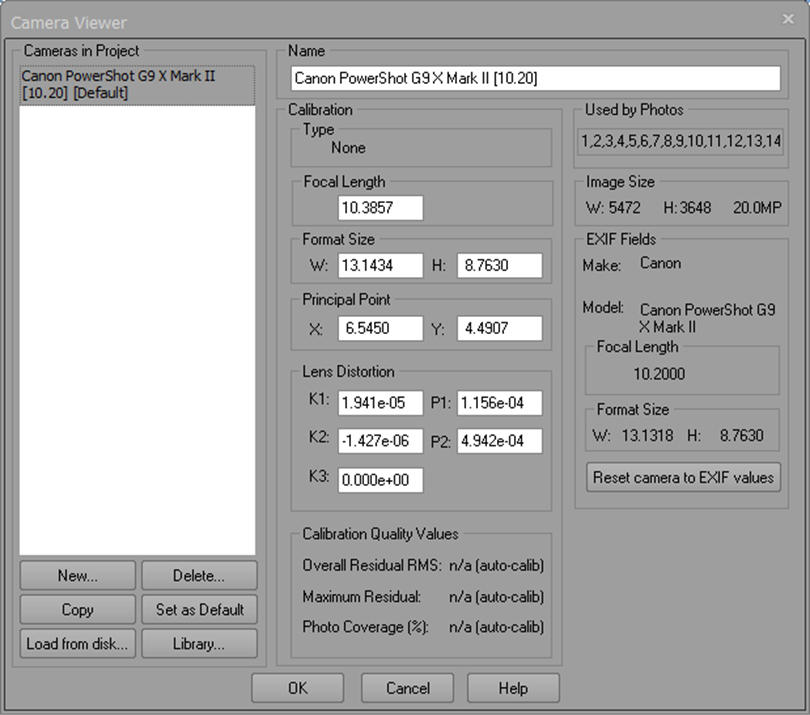
For a camera to be used by a Photograph it must first be stored internally in the project. All cameras stored internally in the current project show up in the Cameras in Project list on this dialog. If this list is empty, there are no cameras used anywhere in this project (which should not happen).
The dialog shows information about each camera in the project. When a camera is selected in the Cameras in Project list, its parameters are shown in the fields to the right of the list. Each of these parameters is explained below.
When you are finished viewing or manipulating Cameras you click the OK button. Click Cancel to close the dialog without changes to modified cameras in effect.